Thứ Bảy, 29 tháng 12, 2018

Auto news on Youtube Dec 29 2018

How to paint a landscape in Photoshop

In this video I will show you the process of painting a landscape in Photoshop.

We will be painting a landscape with mountains and a beatiful colored sky.

I'll use a chalk like brush to paint in a background color first.

I will also lay down the basic shapes of the mountains.

You can keep the painting rough and loose at this point.

Just think about the basic shapes and the composition.

To make separating these mountains easier during the painting process, we'll 'cut' them out.

Make a new layer

First we'll select the mountains way in the back using the lasso tool.

Once you have selected the mountains, fill the selection on the new layer.

We'll do the same for the other mountains, working from the back to the front.

Each mountain will have a layer of it's own.

This is very handy, because you can click on the layer thumbnails

while pressing CONTROL to select the mountain you want to paint on.

You won't be able to paint outside of the selection, so your edges will stay nice and sharp.

Let's select the mountain in the back.

Hold Control on your keyboard and click the layer thumbnail.

Now we can paint inside the selection.

We'll do this on a new layer above all the others

You want to get rid of those marching ants?

Press control plus H on your keyboard to hide them.

We'll paint the basic form of the mountains, adding the suggestion of snow and some rough texture.

Let's move to the sky for now.

We'll start refining the sky on a layer below the mountain layer we were just painting on.

If we would paint on a layer above it, we would easily be painting over the mountains and we don't want that.

We want the edges of the mountains to stay nice and sharp.

Time to start refining the mountains some more.

We'll use the selection trick again.

I'm paying more attention to the lighting and texture for this pass, slowly building up some detail.

Using my Basic Flo brush, I'll add more detail to the sky.

The Basic Flo brush is a round brush with slightly ragged edges and opacity set to pen pressure.

Check out my other video if you want to learn more about painting clouds.

Using a layer set to Overlay, I add more vibrant colors to the sky.

I also add warm and cool tones to the mountains.

The parts that are in shadow will have more cool tones, so I glaze over some blues.

Next I will add a Multiply layer, I will use this layer to add more contrast to the mountains and refine the shadows.

Time to add more texture to the mountains, I will do this on a new layer and use my Chalky Sketcher brush.

You can download this brush for free on my Gumroad page, I will leave a link in the description.

Keep building up those details and textures, till you're happy with your landscape.

You can do it!

Have fun painting landscapes in Photoshop.

Don't forget to give a thumbs up if you liked this video and I will see you next time!

For more infomation >> HOW TO PAINT a landscape in Photoshop | Digital Art Tutorial - Duration: 7:18.

-------------------------------------------

Sennheiser ME2 AVX Digital Wireless Lavalier Microphone System | Gear Talk - Duration: 4:23.

For more infomation >> Sennheiser ME2 AVX Digital Wireless Lavalier Microphone System | Gear Talk - Duration: 4:23.

-------------------------------------------

HOW TO DRAW EYES with different expressions | Digital Art Tutorial - Duration: 6:26.

In this video we will be drawing eyes with different expressions

Eyes can be so full of expression and personality.

Even when you don't see the rest of the face, the eyes can tell a lot about the emotional state of the subject.

We will draw four different eye expressions in this video.

We'll start off with 'smiling' eyes.

I'll fill the entire canvas with a basic skin tone before I start making a sketch.

While sketching, I'll continuously measure everything in my mind, comparing shapes and angles.

But sometimes I use a line on a separate layer to measure.

I'll check if the eyes are about the same size.

While I'm in the sketching fase, I can easily adjust things

Drawing something in a realistic way is all about observing

what do you see when you look at the eyes of someone who is smiling?

What makes the eyes different from eyes with a neutral expression?

Smiling eyes can get a little wrinkly and the eyes are squinted a bit.

The result is that you won't be able to see that much of the iris or the white of the eye.

The eyes can become thin slits.

You will still be able to see the full, round form of the eyeball though.

You can see it behind the 'bags' under the eyes.

Think of what you see while painting your subject.

Where do you see shadow areas?

Because the underside of the eye is a bit puffy, you will find a shadow at the lower part.

Also notice, how the eyebrows stay in place, in a mostly horizontal line.

The next expression will be kind of a 'begging' expression.

That look you get when you ask Santa if you can please have an iPad Pro.

Try making that expression yourself.

You can feel your eyebrows moving, right?

They will curve up like this.

I like starting off with the eyebrow curve for more extreme eye expressions.

You can see how all the lines tend to go to the middle and up.

Even the line directly above the eyes.

It looks a bit like drapes, getting lifted at on point in the middle.

It's good to observe your subject this way, don't just draw with your hand, but with your mind as well.

Really think about what you are seeing.

For each eye I follow the same steps when painting.

I start off with a sketch, then I make a layer below the sketch layer and fill it in with base tones.

I already decide where some shadow areas should be at this point.

Next I'll lower the opacity of the sketch layer and start working on layers above the sketch layer.

I use a normal layer, an Overlay layer

a Multiply layer, a Screen layer and then finally a normal layer again for the final tweaks and details.

The next eye expression is one of slight distrust.

Maybe you'll have this look when you have the feeling someone is tricking you.

One eyebrow will be lifted and the eyes will look to the side.

I will draw the 'flow' of the eyebrows first again.

Using the eyebrows as a reference point, I will sketch in the eyes.

Notice how the left eyebrow moves down a bit and the right eyebrow curves up on the right side.

With this eye expression we'll see a lot of white of the eye.

BUT! Remember from my other videos, the white of the eye isn't white really.

I use a warm grey to fill this area.

To add color to the skin and eyes, I like using an Overlay layer.

I glaze over the skin with oranges and reds.

The last eye expression is one of great surprise

When you're surprised, your eyebrows will lift up quite a bit and your eyes will be spread wide open.

I'll start off with a sketch again.

I'm keeping in mind that there should be a big distance between the eyebrows and the eyes.

I'm using the eyebrows as my anchor point again.

It'll help me decide where to place the eyes.

The eyes will be very round, you will be able the see the roundness of the eyeball very clearly with this eye expression.

I will use an Overlay layer again to add more color variation and give this skin some warm tones.

You can see that with this eye expression, the lower eyelids look a bit like the upper eyelid, they really stand out.

Light will hit on the upper eyelids, so they will be brighter.

The lower eyelids will have a shadow.

Go and practice drawing expressions yourself!

Use a mirror as reference or find some photos. Remember to observe and think about what you're seeing.

I'm sure you can do it! And if you have any questions, feel free to ask!

If you liked this video, don't forget to give it a thumbs up.

I really appreciate it if you do.

I wish you a wonderful day and I hope to see you in my next video!

For more infomation >> HOW TO DRAW EYES with different expressions | Digital Art Tutorial - Duration: 6:26.

-------------------------------------------

Sennheiser 825 & 835 AVX Digital Wireless Handheld Microphone System | Gear Talk - Duration: 5:14.

For more infomation >> Sennheiser 825 & 835 AVX Digital Wireless Handheld Microphone System | Gear Talk - Duration: 5:14.

-------------------------------------------

Candykiki Tutorial ♡ Coloring Eyes | Digital 💛💜💙 (Paint Tool SAI) - Duration: 8:49.

hello my beautiful bunnies! ♥

welcome to my next tutorial!

this time it will be something that you asked for in the comments several times Q v Q

so i really hope you'll find this tutorial helpful

i'm talking here about the tutorial 'how i color eyes'

it isn't too complicated as you may think so you just have to try!

in this tutorial i'm gonna show you the whole process

so sit comfortably and make yourself at home

because this tutorial can be a little wordy Q v Q

before we start, i would like to apologize for my voice

which could be a little cranky because i'm a little bit sick

but don't worry, we're gonna make it through this whole tutorial

i really hope that it won't bother you too much > v <

let's start the tutorial! ♥

'Tutorial - how to color eyes"

i start by drawing out auxiliary lines, which show us where our eyes outlines should start and end

when it comes to this first sketch i prefer to draw my eyes really round and cute

if you want your character to look a little bit more mature

sketch the eyes more narrow and smaller

because of that, the whole face will look more serious and sharp

due to the fact that our character is facing straight, vis-a-vis

we can copy the outline of one eye

but remember, that you can do this ONLY if the character is looking ahead

because even a small change in the face setting can modify perspective, which effects our drawing

and then our second, copied eye will not look good in the final result > _ <

don't be so lazy guys, just draw the second eye properly! T v T) /

after finishing this quick sketch i'm gonna put some cleaner lines to our eyes

as you can see i'm not worrying about making my lines really clean and precise

because i'm working on a really big canvas and i know that after i zoom out my drawing you won't be seeing these messy lines

and tbh this messy style looks really good in the end sometimes Q v Q

so here you can see me again copying lines from the first eye, because both can look the same (omg i'm such a cheater T 3 T)

as for the eyebrows, copying them will make them look unnatural, so i recommend drawing them separately ^ v ^

i also apply the base color of the skin, for illustrative purposes only

the point here is to see how these eyes would look in net result

i start coloring by selecting white of the eye

it's something that you can easily forget when the skin is very bright

so remember to put this white color underneath

or some other color if the whites of our character are yellow or black

because i happened to draw such characters too!

i chose blue color for my eyes because i like working with it the most

if you have watched my previous tutorials, you already know that thanks to the fact that we have lines on another layer

we can pick 'selection source' and fill in our lines only with the bucket tool T v T

also remember that the layer with base color has to be under our lineart

next, i quickly organise my layers because you know that i hate being messy when i'm working > v <

so i create this folder 'eyes' and i put there all my layers that i'll be working with

if you want our next layer to be limited only to the color we have previously applied

we must check the 'clipping mask' box

because of that we will work only in the area that we have previously filled

describing consecutive stages i will refer to the color blue and its shades

let's remember to adjust the colors to what base we chose at the beginning

on the first layer i put a darker shade and erase this oval shape at the bottom of our iris

by using the eraser, we expose our basic blue color o v o

on the next layer we will work in multiply mode

we have to create these two stretched triangles on both sides of the eye

they will define the border between the darker and lighter color

on the next layer (multiply) we apply even darker color only on top of our iris

remember that at each stage we can play with the settings (saturation/hue)

thanks to the fact that we create new layers, each color can be subjected to new settings

this layer with a darker color i like to blend a bit more to make the transition more soft and subtle

the next layer in the overlay mode allows us to create this first reflection at the very bottom of our iris

i really like to choose yellow here because it matches every eye color ♥

on the next layer (overlay), we create the first reflection of light, but remember that this is not the basic glow

so it should remain on the reduced opacity

thanks to this, this reflection is not so obvious and strong

as for this color, i always check in the settings which tint fits here best

as you can see here, i started with the color blue, but at the end I went towards the pink hue

on the next layer (overlay) we draw couple small dots at the very bottom of the iris

the next layer (overlay) will allow us to make room for our pupils ^ v ^

this darker color is not yet the proper pupil (but of course you can leave it like that)

but i prefer to make a depth first that allows our pupils to stand out even more

i create pupils on the next layer

in my case they are white, but here you can also check which color suits you best

it can be white, black or grey

this little dot changes everything because thanks to this our character begins to see T v T

the next layer will be in the luminosity mode

this luminosity mode allows us to create even brighter spots (and i love the shine!)

i also leave this tiny dots in iris that imitate starry sky ♥

if you don't have a brush that allows you to disperse these dots, you can do it manually

of course, it will take more time, but the effect will be similar!

now we are going to the most important part, which is creating our main reflection of light

remember that this reflection should also pass through our layer with lineart

so this layer with the reflection must be at the very top of all layers

we must remember that if this light in our eyes is on the left

we should remain consistent in coloring the whole drawing, so keep illuminate our character from the left

in addition to the basic reflection of light, i like to do such small brush strokes also on the remaining lines

because of that, we add even more light to these eyes

of course, you can overdo everything, but recently i really like to add these small dots also on the remaining lines

all right, who wants even more light in our eyes? (๑˃ᴗ˂)ﻭ

if so, create an additional layer with a gray color that appears on top of our iris

we can blend it a little bit and decrease the opacity

this gray color will add a light gloss to our eyes

the last stage will be coloring our lines

i think this small change adds a lot of charm to our character [i have changed color of my lineart before]

however, you have to be careful because when we have green eyes, for example

let's face it, green eyelashes will look strange (;⌣̀_⌣́)

so remember to always check it out instead of follow this beaten path ♥

the most universal color will be black here

because it will match any base color!

okay, now it is really the last stage! ╰(▔∀▔)╯

in overlay mode, over our layer with lines

i also repaint the ends of our lashes to make them shine even more (i'm addicted to shine, okay?) ♥

and that's it!! (ノ´ヮ`)ノ*: ・゚

as usual, i wish you good luck! ♥

let me know if you would like to know the other secrets of my drawing (´。• ᵕ •。`)

i hope this tutorial will be helpful to some extent

don't give up, draw and watch out for colds (*꒦ິ꒳꒦ີ)

see you in the next video! bye bye ♥ ♥ ♥

For more infomation >> Candykiki Tutorial ♡ Coloring Eyes | Digital 💛💜💙 (Paint Tool SAI) - Duration: 8:49.

-------------------------------------------

Digital Signatures Explained By Setindiabiz - Duration: 2:29.

Digital Signature Certificates (DSC) are the digital equivalent

(that is electronic format)

of physical or paper certificates.

Few Examples of physical certificates are

Drivers' licenses

passports or

membership cards.

Certificates serve as proof of identity of an individual

for a certain purpose

for example

a driver's license identifies someone who can legally drive in a particular country.

Likewise,

a digital certificate can be presented electronically

to prove one's identity

to access information or services on the Internet

or to sign certain documents digitally.

Physical documents are signed manually,

similarly,

electronic documents,

for example e-forms are required to be signed digitally

using a digital signature certificate.

A licensed Certifying Authority (CA) issues the digital signature.

Certifying Authority (CA) means

a person who has been granted a license

to issue a digital signature certificate

under Section 24 of the Indian IT-Act 2000.

For example, certifying authority

National informatics center (NIC)

IDRBT certifying authority

emudhra

NSDL etc..

The certifying authorities are

authorized to issue a digital signature certificate

with a validity of one or two years.

Login:www.setindiabiz.com

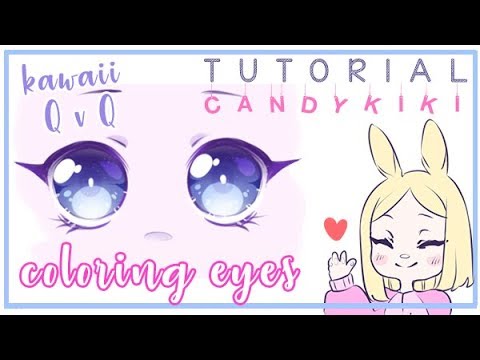
Không có nhận xét nào:

Đăng nhận xét